UZH Print Plus - Set Up Black and White Printing
By default, print jobs are executed in color. To set black and white printing:
Macintosh
- In the print dialog, adjust the desired settings in the following order:
-
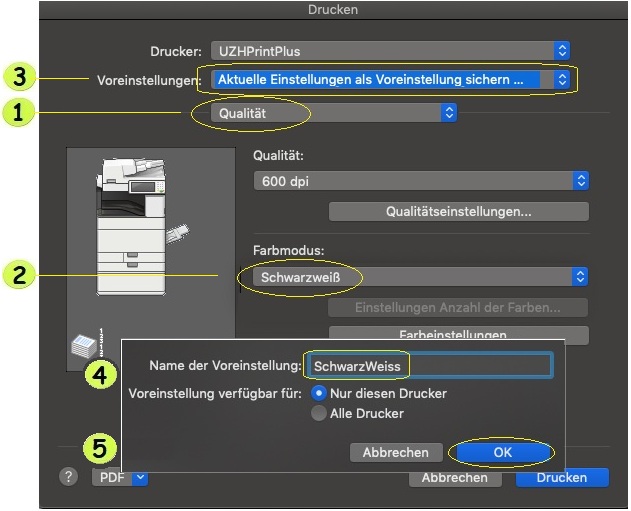
Tab selection (drop-down list): Quality
-
Color mode: Black and white
-
Presets: Save current settings as preset
-
Preset name (text field in new window): Black and white
-
Preset available for: Only this printer > «OK»
-
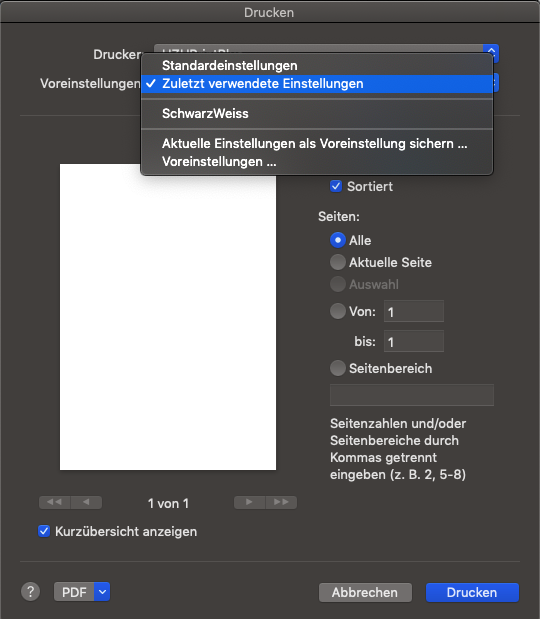
Presets: Select Black and White this time.
-
- After that, all print jobs sent to the UZHPrintPlus printer will automatically be printed in black and white.
Tip: Instead of creating your own preset, you can also use the «Last used settings» option.
Alternative (for advanced users only): Set default to black and white
- Open Terminal in Finder under Applications > Utilities.
- Enter the command and confirm with Enter:
cupsctl WebInterface=yes
Then close Terminal. - Open http://localhost:631 in your browser
(only accessible locally). - Select the UZHPrintPlus printer under Printers.
- Open Administration > Set Default Options.
- Set the color mode to black and white under Quality and save with Set Default Options.
Windows
- Open Control Panel > Devices and Printers.
- Right-click on UZHPrintPlus [...] > Printer settings.
- Color mode: Select Black and white and confirm with «OK».
Linux
- Open the print settings and select the UZHPrintPlus printer.
- Under Color, set the color mode to black and white.
Alternatively: Open http://localhost:631 and follow the instructions for Mac.
Note:
Before printing starts, the console on the multifunction device displays a symbol indicating whether the job will be printed in color or black and white.